本文介绍如何使用 Terraform 创建一个基础配置的 Azure Kubernetes Service (AKS) 集群,可以用于快速的启动一个开发测试环境,基础特性如下。
- 使用尽可能多的默认值
- node pool 使用了自动扩展,最小节点数为 1,最大节点数为 10
- AKS将使用由Azure自动创建和管理的托管身份
登录 Azure
参考这篇文章《创建用于命令行登录认证 Azure 的 Service Principal 必读》,创建一个用于在命令行登录认证 Azure 的 Service Principal。
为了将创建的 Service Principal 的细节信息,用于命令行变量,方便 Azure CLI 命令的参数化,还为了将所有必要的变量带入 .tf 文件的变量中。可以参考下面的命令:
 1
 2
 3
 4
 5
 6
 7
 8
 9
10
11
12
13
| export TF_VAR_subscription_id=XXXXXXX-XXXX-XXXX-XXXX-XXXXXXXXXXXXXX
SERVICE_PRINCIPAL_JSON=$(az ad sp create-for-rbac --name aks-getting-started-sp --role Contributor --scopes /subscriptions/${TF_VAR_subscription_id} -o json)
TF_VAR_client_id=$(echo $SERVICE_PRINCIPAL_JSON | jq -r '.appId')
TF_VAR_client_secret=$(echo $SERVICE_PRINCIPAL_JSON | jq -r '.password')
TF_VAR_tenant_id=$(echo $SERVICE_PRINCIPAL_JSON | jq -r '.tenant')
az login \
--service-principal \
--tenant $TF_VAR_tenant_id \
--username $TF_VAR_client_id \
--password $TF_VAR_client_secret \
--output table
|
以上在创建 Service Principal 的时候,使用了 --scopes /subscriptions/${TF_VAR_subscription_id},这样就可以在任何一个资源组中使用这个 SP 了。假如你需要在多个不同订阅之间工作,可以灵活的使用 ${TF_VAR_subscription_id} 这个环境变量,来指定不同的订阅 ID。
这段命令中一共设置了四个命令行的环境变量,由于需要在 .tf 文件中作为变量使用,因此需要使用 TF_VAR_ 前缀,这样 Terraform 才能识别到这些变量。
Terrafrom 命令行工具的安装本文忽略,详见官方文档 Terraform CLI 。
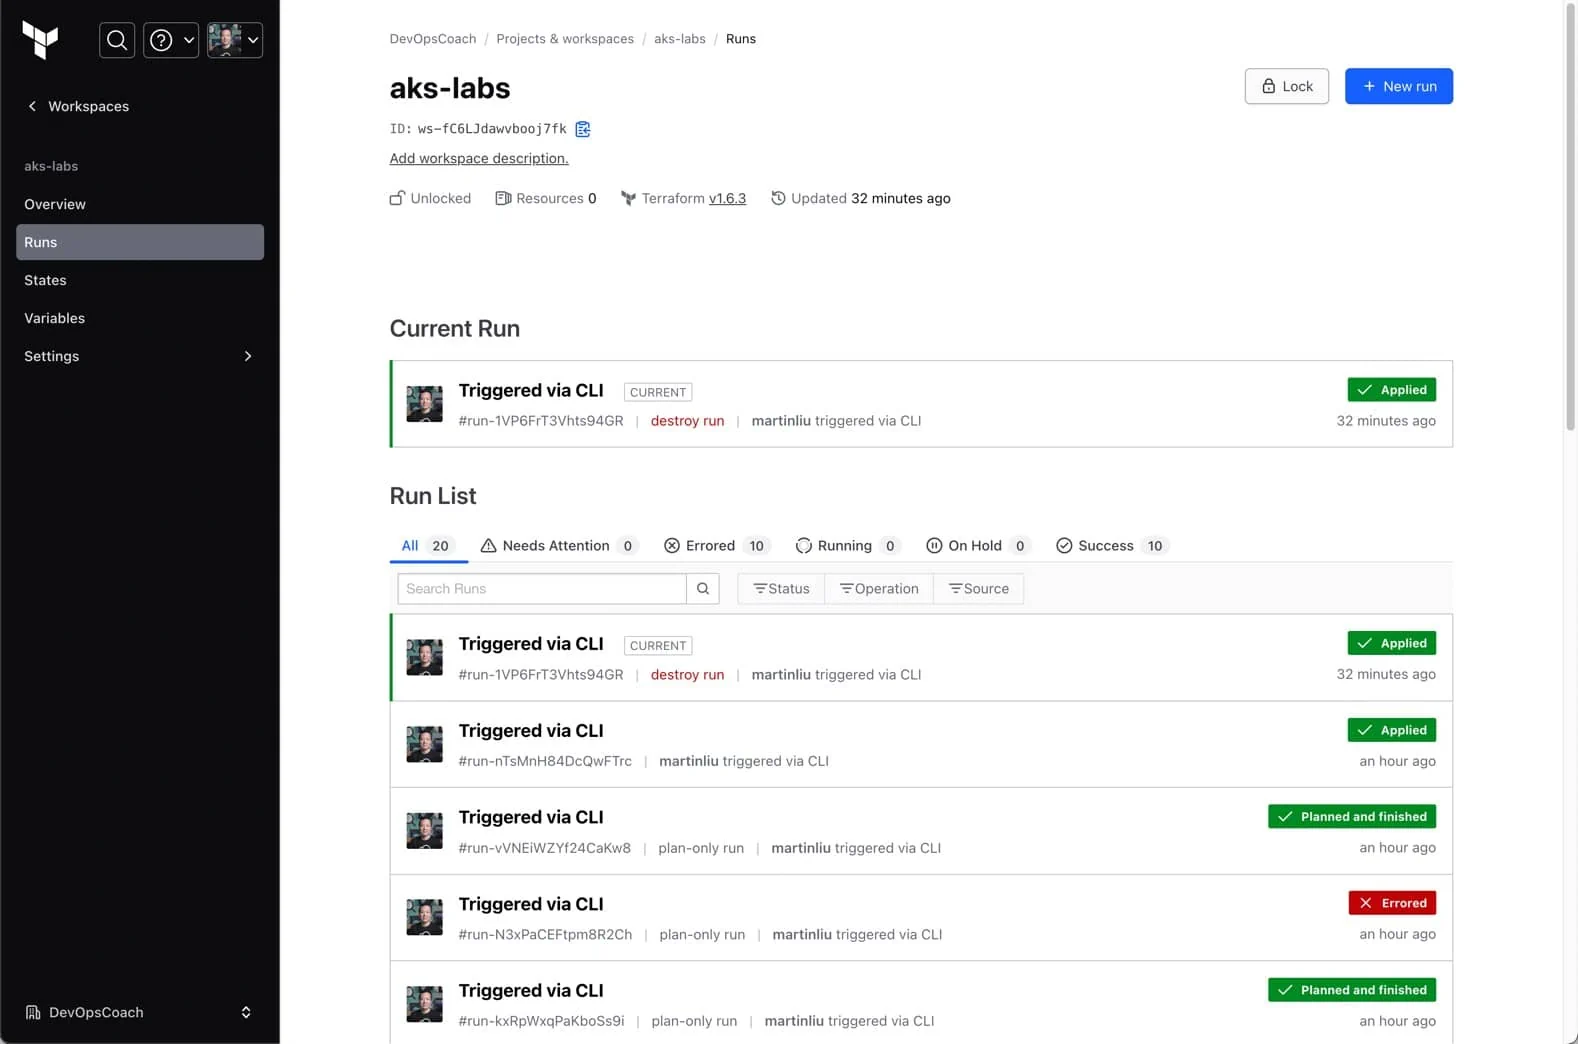
Terraform Cloud 是 Terraform 官方提供的一种 SaaS 服务,可以用于管理 Terraform 的状态文件,以及执行 Terraform 的计划和应用。本文中使用 Terraform Cloud 来管理状态文件,以及执行计划和应用。
首先,你需要在 Terraform Cloud 中创建一个组织,然后创建一个工作区,用于存放状态文件。然后,你需要在本地安装 Terraform CLI 命令行工具,然后使用 Terraform CLI 命令行工具,登录 Terraform Cloud。
创建 AKS 集群
本文使用的样例代码在 GitHub 上,你可以直接使用这个样例代码,也可以参考这个样例代码,自己创建一个 AKS 集群。
下面是样例代码中的 main.tf 文件,这个文件中包含了创建 AKS 集群的所有必要的配置。
 1
 2
 3
 4
 5
 6
 7
 8
 9
10
11
12
13
14
15
16
17
18
19
20
21
22
23
| terraform {
# 使用远程 Cloud 后端
cloud {
organization = "DevOpsCoach"
workspaces {
name = "aks-labs"
}
}
}
provider "azurerm" {
features {}
# 下面的配置允许 Terraform 以您的身份与 Azure API 进行交互,从而管理您的资源。
# 从 CLI 的环境变量中取得这些实际的数值
tenant_id = var.tenant_id
subscription_id = var.subscription_id
client_id = var.client_id
client_secret = var.client_secret
}
resource "azurerm_resource_group" "example" {
name = "${local.prefix}-rg"
location = local.location
}
|
以上文件中引用了两种变量,一种是从 locals.tf 文件中引用的本地变量,另一种是从命令行的环境变量中读取到的TF_VAR 开头的变量。这样从 Terraform 命令行执行之前,就可以将这些变量设置好,然后 Terraform 就可以使用这些变量了。
下面是样例代码中的 locals.tf 文件,这个文件中包含了创建 AKS 集群的所有必要的本地变量。
 1
 2
 3
 4
 5
 6
 7
 8
 9
10
11
12
13
14
15
16
17
18
19
20
21
22
| locals {
prefix = "aks4devops"
location = "eastasia"
}
variable "client_id" {
description = "Client ID for the Azure provider"
type = string
}
variable "client_secret" {
description = "Client Secret for the Azure provider"
type = string
}
variable "subscription_id" {
description = "Subscription ID for the Azure provider"
type = string
}
variable "tenant_id" {
description = "Tenant ID for the Azure provider"
type = string
}
|
这里文件中设定了两个变量参数,另外还声明了四个命令带入的变量,它们是从命令行的环境变量中读取到的TF_VAR 开头的变量。
下面是样例代码中的 aks.tf 文件,这个文件中包含了创建 AKS 集群的所有必要的配置。
 1
 2
 3
 4
 5
 6
 7
 8
 9
10
11
12
13
14
15
16
17
18
19
20
21
22
23
| resource "azurerm_kubernetes_cluster" "example" {
# AKS cluster basic information
name = "${local.prefix}-k8s"
location = azurerm_resource_group.example.location
resource_group_name = azurerm_resource_group.example.name
dns_prefix = "${local.prefix}-k8s"
# node pool settings
default_node_pool {
name = "default"
node_count = 2
min_count = 1
max_count = 10
vm_size = "Standard_DS2_v2"
enable_auto_scaling = true
}
# AKS use system auto created identity
identity {
type = "SystemAssigned"
}
}
|
以上集群基本上使用了所有的系统默认配置,除了设定了一个 node pool,这个 node pool 使用了自动扩展,最小节点数为 1,最大节点数为 10。
在阅读了这些文件之后,就可以在本地执行 Terraform 的计划和应用了。
1
2
3
| terraform init
terraform plan
terraform apply
|
在执行以上命令的过程中,我们可以在 Terraform Cloud 的 Web 界面中,看到 Terraform 的执行过程。

在测试完成了之后,可以使用下面的命令,删除 AKS 集群。
参考

